Howdy, after a stretch of busy life I am back. My boss bought a Cabin and I've been helping remodel. I am home this morning with my daughter who is sick so I thought I would Take a couple minutes to update the blog.
I am currently working on the neck.
I started with a piece of maple that was a cutoff from a cabinet shop. I think I am going to get two necks out of it. I first cut out the rough shape. I square the Fret board plane with my Craftsman Bench plane, I also like to square the peg head at this point. Now I cut the Truss rod channel down the middle. I like to do that now because I can do it with table saw(I don't own a router). One of the Joys of building, one of the things I like best, is having a goal in mind, a pattern to follow, but not a full shop of tools. Instead it takes creativity to find the best way to do the job with the tools and resources I have. My first truss rod channel I cut with a 1/4 chisel. It was fun but time consuming.
Once the truss rod channel is cut I rough cut the sides of the fretboard section. Time to glue on the ears to make the peg head wide enough for the shape we all love. I dig through my scrap box to find pieces close to the shape I need, that way I don't have to cut it out of fresh wood. Glue them on and walk away. Once the glue is dry I square ears with the top and back of the peg head. Now I clamp the whole thing into a jig I made out of scrap lumber from an electric fireplace mantel...( :) I do a lot of that... scavenge and re-purpose). I clamp the jig into the bench vise and reach for my Stanley spokeshave, my rasp, and a couple of files.
Starting with the spokeshave I do some serious material removal. Then I grab the rasp and do a little more. I won't take it to the final shape till after the fretboard has been shaped and I can cut and scrape the neck to the sides of the board. Depending on the the final destination I may make the fretboard a little wider or narrower, or the neck thinner or fatter. My A style has a wider fretboard and thicker neck because the friend that it's going to will be playing Praise music with it more open chords than chops or picking. The wider neck = more mass = more sustain + a cedar top for mellower tone + a maple back for crisp clarity = one awesome mandolin for His particular style. I have played it myself (breaking it in...;) for church, It sounds great and slips into the band mix nicely.
I fit the Truss rod and build a truss rod pocket, I also fit in two brass bars. The bars are a bit of an experiment to see if the added mast will add sustain. I have used a heavier than traditional neck to give me more tone and sustain. Players have have loved the tone but not the thickness of the neck. Hopefully this will give me the advantages with easier playability.
I glued in the truss rod channel fillers and the brass bars.
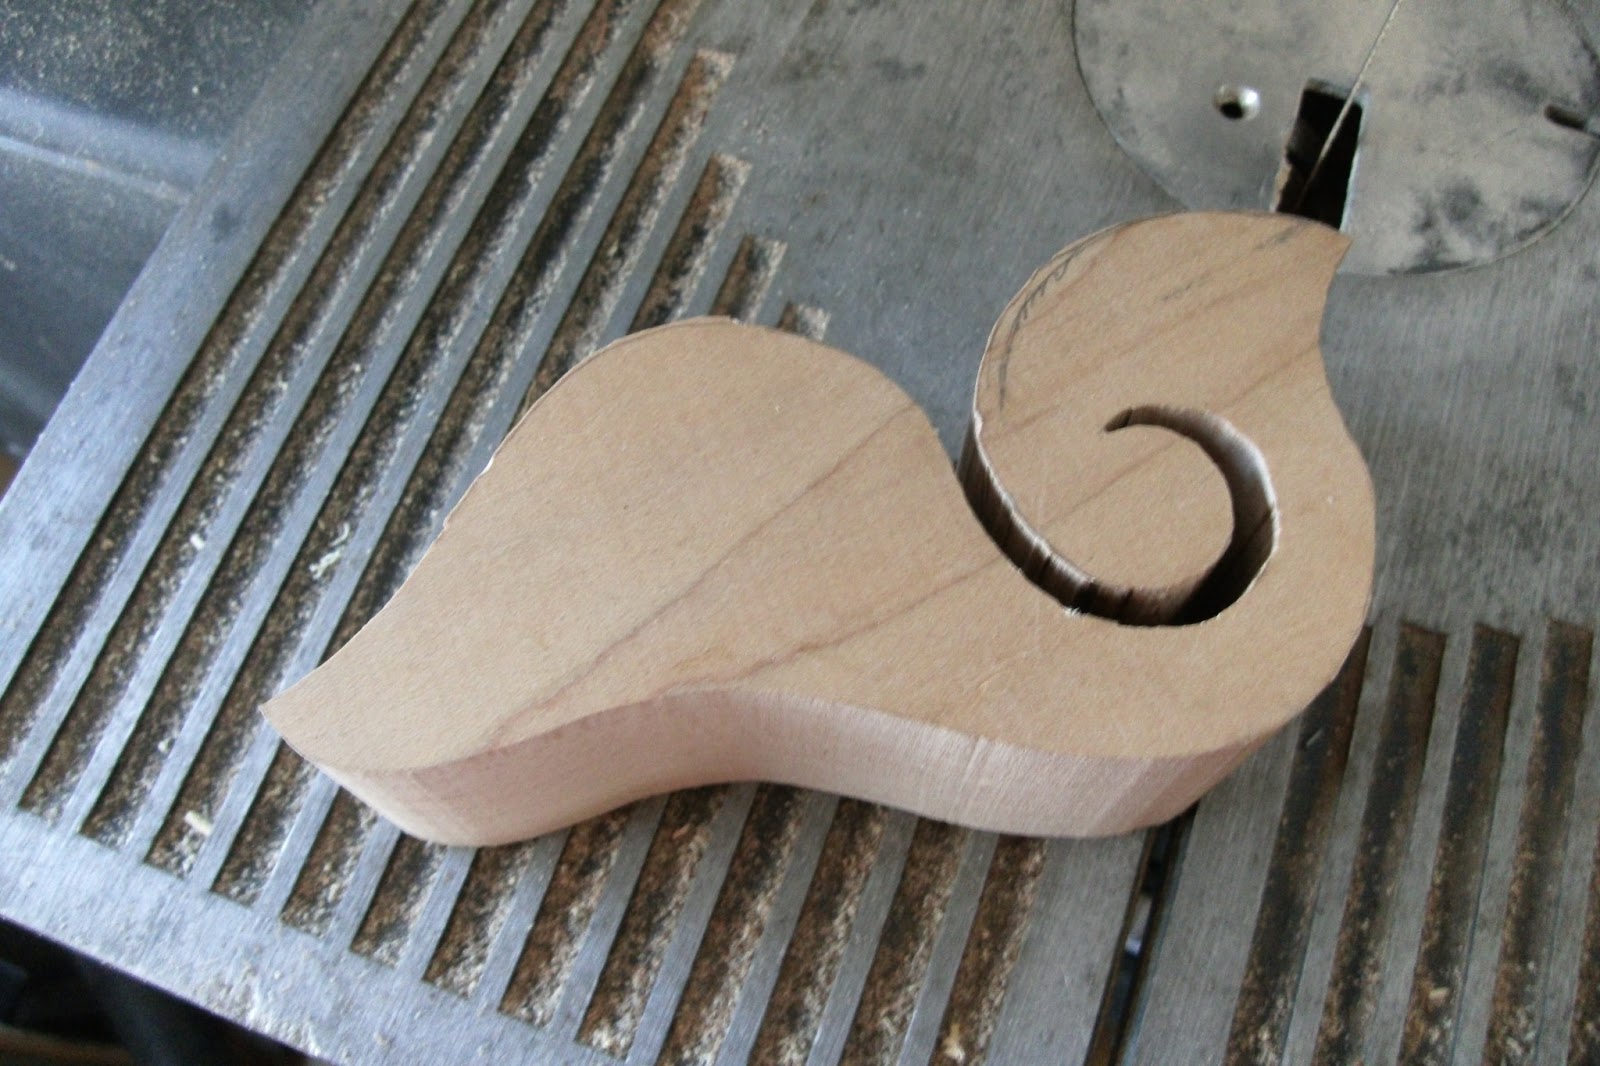
I glued on the peg head veneer (curly Maple). Once the glue dries I cut out my peg head shape. I have redesigned the shape slightly removing the common break off points and simplifying the design a bit.
Now I am eagerly awaiting the delivery of a compound radiused Ebony fret board. the tracking info says its out for delivery. Could be here any minute.
Tony
I would love to here from you. I am open to better/easier ways to do things, or opinions, thoughts or just conversation.
www.tonynoordmans.com
Friday, May 17, 2013
Friday, January 18, 2013
A sneak peak.
 |
| Just to help you get as excited as I am about this instrument, here are some pictures of the parts so far. Above is the back getting cut out on the bandsaw. |
 |
| Here is the maple rim with my "keeper" in it to hold the shape. It is also curly maple. |
 |
| The tuners and tailpiece. Tailpiece is an Allen cast bronze, already working on a nice patina. The tuners are Golden Age Relic Brass. They are new. They just look like they are 80 years old. |
 |
| The Belly is a beautiful piece of Engelmann spruce from the mountains of Colorado. Consistent 20+ Grains per inch, and clear, pure color all the way through. |
 |
| The neck is maple, has a classic truss rod, plus brass bars inlayed for added mass to hopefully improve sustain and tone. The peghead has a slightly adjusted classic shape. Similar shape but the common damage points have been eliminated for a cleaner, less fragile System. |
 |
| Another shot of the back. Check out that curl! |
Sunday, January 13, 2013
 |
Building the Rim
Having built several instruments I had a pretty good idea of how I wanted everything set up, what I needed in my shop and how often I would be using it. So It didn't take to long to get set up.
I plan to start a little different with this one, do things in a different order. In the past I started with the neck or the top, two of the easier steps. This time I plan to start with the rim, the part that has given me the most trouble in the past.
 |
| Here is the Shop. The Drill press on top of the book shelf. The mandolins hanging on the tool cabinet. The barrel in the corner is for wood shavings from the carving process. We use the shavings to light the fire in our wood stove that heats the house. |
 | ||||
| The other shot. This is my workbench under the window. In Daylight out that window I can see the treeline that follows Mosquito Creek. On the right is the other power tool that I use most every day in the shop, my bandsaw. |
laptop.
 |
| Here Is my poor mans bending iron. I could spend $130 on the pro setup or I went to the local hardware store and bought a hot knife, a piece of conduit and a couple of bolts with nuts and washers. Grand total of...$25 |
 | |||||||||||||||||||||||
| The best shallow water container I could find in the house. I've used the same thing on all my mandolin builds so far. An ultimate frisbee flipped upside down and filled about 1/4" with water. I dip the tips of my fingers in the water, then I heat the wood on the iron. When the wood reaches a certain temp It turns amazing. They call it "plastic" and yes that's about what it seams like, it bends very easily. I keep it moist because the water turns to steam and the steam carries the heat through the wood. So its dip, moisten, heat, bend, smile with delight as the step of the process that once was so hard to figure out goes smoothly. |
 |
| I have built an inside jig for holding my sides. this works great with the spring clamps I like for this purpose. I bend the piece to fit and clamp it in. Then I leave it to "set" overnight. I'm not sure what that does other than dry out the moisture in the wood. But I've done it and in theory it helps. This form holds two of the pieces that make up the bent sides. The other goes in a different form. I tried to build the two forms together and decided it would just work better to do them separate. |


Thursday, January 10, 2013
 |
| Squaring the neck. |
Let me introduce myself. My name is Tony Noordmans. I've been a musician for nearly 25 years, a woodcrafter for more years than that and a country boy for pretty much my whole life.
When I was about 6 years old, my Pa showed me a few chords on the Tenor Uke. Wasn't to long after that I found a Stella Harmony guitar at a garage sale for $5 and I learned to love to play. Mom had an old Centennial Marine Band harmonica so I started playing around with that. Dad had an old Harmony Monterey mandolin and I picked that up. Well about this time I ran out of instruments in the house so I started shopping. I learned that instruments cost money and I didn't have much of that. I did however have access to my Dads tools and shop and a whole bunch of scrap wood. I built a dulcimer which later got demolished ( I think a sibling sat on it...). I bought a couple of kits and built a banjo and a violin. Now I was getting kind of cocky and decided to try a mandolin... from scratch. I did great, I had the neck all carved to perfection, the back and the belly shaped nicely, the fretboard ready to go, even the pick guard was cut out and sanded smooth. Then catastrophe struck. I couldn't for the life of me figure out how to bend the sides. I busted three sets, burned my fingers badly, moaned and wailed. After checking out every book I could get on the subject from our local library (a total of two), I gave up. I donated the tools I had bought to a fundraiser garage sale; I burned the wood and tossed the patterns in the trash. I played cheap instruments and worked "real" jobs for 15 years. So much for my Stradivarius dreams.
One day I found myself married with a baby and no job. I had sold most of my cheap instruments to pay the rent. Due to an "economic downturn" no matter how hard I searched I landed no job. All I had was a shop full of tools and a bunch of scrap wood... hmmmm, sound familiar? But hope has been added to the mix, something new, the world wide web. The amazing and sometimes mind boggling invention that brings information to anyone who has the ache for knowledge. God bless you builders of all kinds of instruments who have pictures of your shops and jigs and fixtures and processes. You have been my teachers. I have learned to bend wood! In fact, I have in my knowledge bank several different ways to bend wood.
Three years later I am gainfully employed, still happily married and now with three children, a shop full of tools and (not all)scrap wood, I have built three (almost four) mandolins. I bought a house a half mile from Mosquito Creek, I can almost see it from my shop window. The moment of truth has arrived. The question lies before me, am I to be a great mandolin builder? Or will this adventure merely provide me with a nice mandolin of my own and great lessons learned?
 |
| Practice Instruments: #2 f style with mule deer antler points and #3 a cedar topped A style with a sweet woody sound. Below is the rim for the first Mosquito Creek awaiting a bit of hot hide glue. |
Subscribe to:
Posts (Atom)